

Introduction
Keeping your child safe at home is every parent’s top priority. As babies grow into curious toddlers, they begin to explore every corner of the house. This natural curiosity, while important for development, can also lead to accidents if the home is not properly secured. That’s why learning how to childproof a house room by room is essential for creating a safe environment.
Many parents assume that childproofing only involves covering sharp edges or locking cabinets. However, true safety goes beyond that. Each room in your home presents different risks, from choking hazards in the living room to water dangers in the bathroom. Understanding these risks helps you take the right precautions.
In this guide, you will learn how to childproof a house room by room using simple, practical steps. Whether you are a first-time parent or looking to improve your current setup, this article will walk you through everything you need to know.
What is How to Childproof a House Room by Room?
How to childproof a house room by room refers to the process of identifying potential dangers in each area of your home and taking steps to eliminate or reduce those risks.
Instead of applying general safety measures, this method focuses on each room individually. For example, the kitchen requires different safety tools than the bedroom. By breaking the house into sections, you can ensure no hazard is overlooked.
Childproofing includes:
- Installing safety devices like cabinet locks and outlet covers
- Rearranging furniture to prevent tipping
- Removing small objects that can cause choking
- Securing doors, windows, and staircases
This approach is especially useful because children interact with each room differently. A toddler may crawl in the living room, climb in the bedroom, and explore drawers in the kitchen. Each activity requires specific precautions.
In simple terms, how to childproof a house room by room is a structured way to make your entire home safer for children of all ages.
Why is How to Childproof a House Room by Room Important?
Understanding how to childproof a house room by room is important because accidents at home are more common than many people think.
Children are naturally curious. They touch, grab, climb, and taste things without understanding danger. Without proper safety measures, even a small hazard can lead to serious injury.
Here are key reasons why childproofing matters:
- Prevents injuries: Falls, burns, and choking incidents can be reduced significantly
- Encourages safe exploration: Children can move freely without constant danger
- Reduces parental stress: You don’t have to worry every second
- Builds a secure environment: A safe home supports healthy growth
For example, an unsecured bookshelf in the living room can tip over if a child tries to climb it. Similarly, cleaning chemicals in the kitchen can be harmful if not locked away.
By learning how to childproof a house room by room, you can identify these risks early and take action before accidents happen.
Detailed Step-by-Step Guide
Living Room Safety
The living room is often where families spend most of their time. It may seem safe, but it contains many hidden dangers.
Start by securing heavy furniture:
- Anchor TVs and bookshelves to the wall
- Use corner guards on sharp edges
- Keep remote controls and small items out of reach
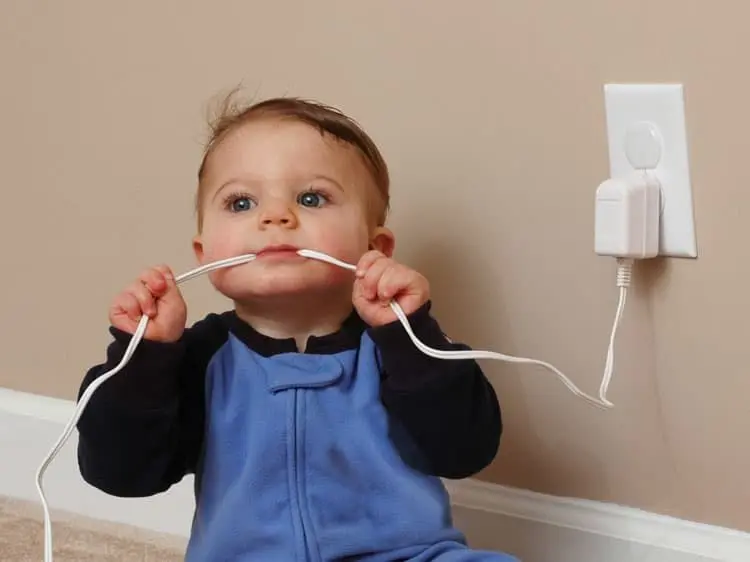
Electrical safety is also important:
- Cover all unused outlets
- Hide or secure loose wires
In addition, avoid placing decorative items like glass vases or candles within a child’s reach. These can easily fall and break.
Kitchen Safety
The kitchen is one of the most dangerous areas for children. It contains sharp tools, hot surfaces, and harmful substances.
Here’s how to make it safer:
- Install child locks on cabinets and drawers
- Keep knives and utensils in high or locked storage
- Use stove knob covers to prevent accidental turning
Always store cleaning products in locked cabinets. Even small amounts can be harmful if ingested.
Also, turn pot handles inward while cooking. This simple habit prevents children from pulling hot pots down.
Bedroom Safety
Bedrooms should be a place of rest, but they can still pose risks.
For child safety:
- Use a firm mattress with a fitted sheet
- Avoid placing pillows or toys in cribs for infants
- Secure dressers and wardrobes to the wall
Keep cords from blinds or curtains out of reach, as they can pose a strangulation risk.
Nightlights can help children move safely in the dark, especially if they wake up at night.
Bathroom Safety
Bathrooms require special attention due to water and slippery surfaces.
Important safety steps include:
- Install non-slip mats in the bathtub
- Use toilet locks to prevent drowning risks
- Keep medicines in locked cabinets
Always check water temperature before bathing a child. Hot water can cause burns within seconds.
Never leave a child unattended in the bathroom, even for a short moment.
Staircase and Hallway Safety
Stairs are a major hazard for young children.
To reduce risks:
- Install safety gates at the top and bottom of stairs
- Ensure railings are secure and properly spaced
- Keep stairs free from toys and clutter
Good lighting is also important in hallways. It helps prevent trips and falls, especially at night.
Outdoor Areas
If your home has a yard or balcony, it must also be childproofed.
Key steps include:
- Install secure fencing around the area
- Lock gates at all times
- Remove sharp tools or gardening equipment
Balconies should have safety guards, and furniture should not be placed near railings to prevent climbing.
Benefits of How to Childproof a House Room by Room
Childproofing your home offers several important advantages:
- Enhances overall home safety
- Allows children to explore freely
- Reduces risk of accidents and injuries
- Provides peace of mind for parents
- Creates a child-friendly living environment
- Encourages independence in children
Disadvantages / Risks
While childproofing is essential, there are some challenges:
- Initial cost of safety equipment
- Time required to install and maintain devices
- Over-reliance on safety tools instead of supervision
- Some devices may limit convenience for adults
Despite these drawbacks, the benefits far outweigh the risks.
Common Mistakes to Avoid
When learning how to childproof a house room by room, many parents make simple mistakes.
Avoid these common errors:
- Ignoring less-used rooms like guest bedrooms
- Forgetting to update safety measures as the child grows
- Using low-quality or unreliable safety products
- Leaving small objects within reach
- Assuming supervision alone is enough
For example, a crawling baby may not reach high shelves, but a toddler can. Always adjust your setup as your child develops.
FAQs
1. When should I start childproofing my home?
You should start childproofing before your baby begins to crawl, usually around 5–6 months. Early preparation helps prevent accidents.
2. Do I need to childproof every room?
Yes, every room should be checked for potential hazards. Even areas you rarely use can become dangerous if a child enters them.
3. Are childproofing products expensive?
Prices vary, but many essential items like outlet covers and cabinet locks are affordable. You can start with basic tools and upgrade later.
4. Can I rely only on supervision?
No, supervision is important but not enough. Children move quickly, and accidents can happen in seconds. Safety measures provide extra protection.
5. How often should I update childproofing?
Review your home every few months. As children grow, they develop new abilities like climbing and opening doors.
6. Is childproofing necessary for older kids?
Yes, although the level of protection may change. Older children still need safety measures, especially around electrical outlets and sharp objects.
Expert Tips & Bonus Points
To make your efforts more effective, consider these expert tips:
- Get down to your child’s level and look around for hazards
- Teach basic safety rules as your child grows
- Use multi-purpose safety devices to save money
- Regularly check for loose or broken safety equipment
- Involve all family members in maintaining safety
Another helpful tip is to create a “safe zone” where your child can play freely without constant supervision. This area should be fully childproofed and free from hazards.
Conclusion
Learning how to childproof a house room by room is one of the most important steps you can take as a parent. It not only protects your child from potential harm but also gives you peace of mind in your daily life.
Every room in your home has its own risks, but with careful planning and simple adjustments, you can create a safe and comfortable environment. From securing furniture in the living room to locking cabinets in the kitchen, each step makes a big difference.
Remember, childproofing is not a one-time task. As your child grows, their abilities and behaviors will change. Regular updates and checks are essential to maintain safety.